I am honored to be the ‘Featured Quilter’ at the Northwest Quilting Expo in Portland Oregon this September! The show organizers have asked me to display a retrospective of all my work from the earliest quilt to the latest. Those attending the show will get to see some of my early work from when I did not grasp that perhaps a mink coat was not a good material to include on a quilt. My plan is to hang about 50 panels of work in every imaginable style and technique.
Most of my early quilts are embarrassingly bad and few people ever see them but they are my roots from which all I now do grew. I really hope everyone – especially novice quilters who may feel insecure about their skills – will take heart from seeing my humblest most awkward attempts at making a quilt; sometimes when I look at these old quilts, I am amazed I did not give up in discouragement.
Over the many (47 at this point) years I have been quilting, I have explored many techniques and styles – traditional to contemporary but with an emphasis on pictorial quilts. This exhibit will be a sampling of all of these explorations from the smallest miniatures to my largest quilts. The show has graciously offered me table space to sell patterns and I plan to supplement this with occasional demos as time allows.
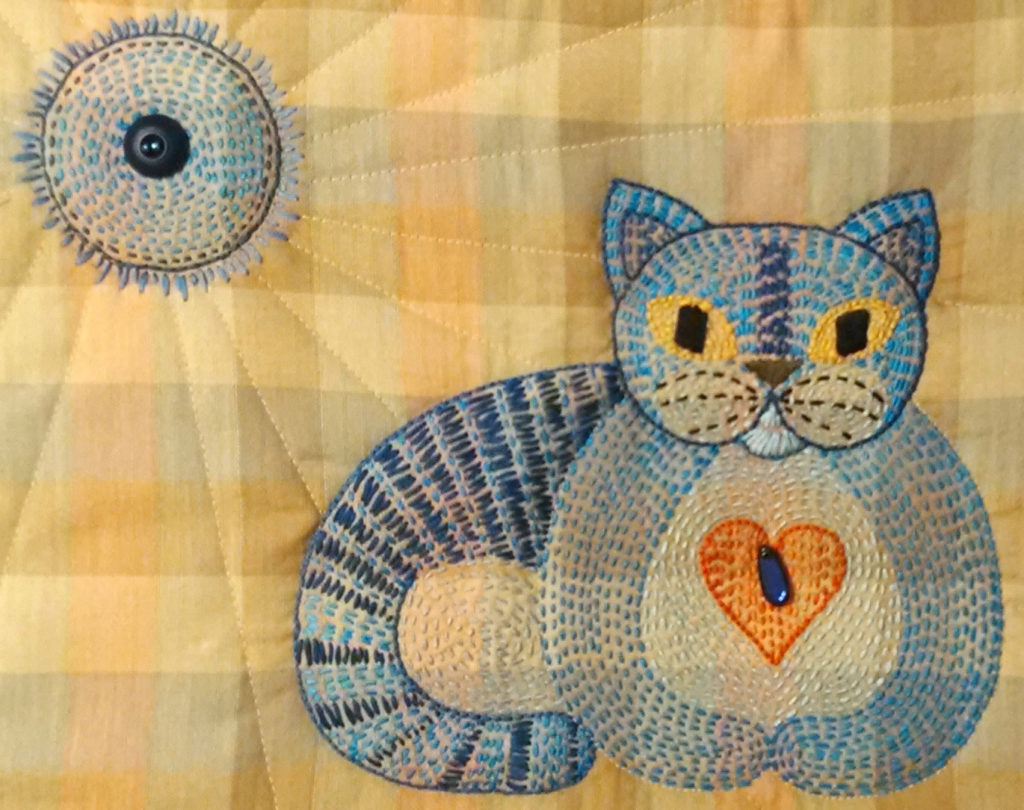
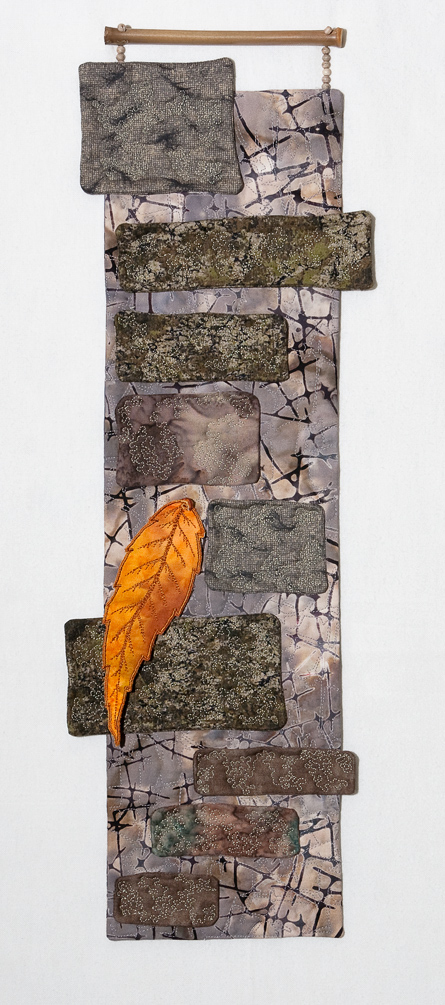
I will also be offering a couple of classes at Expo, one on Kantha embroidery and the other on small scroll-like wall hangings inspired by the stone pathways in a Japanese Garden that I call Zen Pathways; pictures of these class projects are below. You can get more information from the Northwest Quilting Expo website.
A kitty in Kantha stitchingFolk Art cat stitched in the Kantha styleArdie’s Kantha KittyLeaf design in Kantha StitchingJoy’s Kantha KittyStacie’s Kantha KittyMary’s Kantha KittyKantha Bird‘Under the Ginko tree’ – a Zen Pathway quiltZen Pathway #2
Remember the old Pete Seeger song from the 60’s – ‘Where Have All the Flowers Gone?’ These poignant lyrics can be applied to quilt shops as yet another one closes it’s doors. A sad farewell to Sewn Loverly in Wilsonville Oregon which closed earlier this month. When I moved to Portland in 1991, I was astounded by the number and variety of quilt shops here. Some might argue that having many shops diluted the market and made for stiff competition between the shops but from the standpoint of a quilter, few shops can carry EVERYTHING you might want and having that many stores made for access to a very diverse selection of fabrics to suit every taste.
Most stores had a decent selection across a wide range of fabrics but with an emphasis on a particular style or genre. Momma Made It, specialized in Civil War fabrics – I never realized there were so many of these available until I first visited that shop years ago – it is now gone. Scarborough Flair – also long gone – carried every single fabric in the RJR Jinny Beyer collections. Cedar Ridge quilts which opened in the last couple of years in Oregon City, carries a wonderful selection of floral and botanical prints – those who enjoy Laura Heine’s collage quilts will find plenty to chose from here. A Common Thread at one time had the best collection of Batik fabrics to be had, now that it too is gone along with Fabric Depot, that honor can be shared by Pioneer Quilts (Milwaukie) and Sharon’s Attic (Aloha) who are still open and both carry a large selection of these beautiful favorites, and Pioneer Quilts has arguably the best selection of wool for the Sue Spargo and Primitive Gatherings fans but for how long? I heard that last year Oregon and southwestern Washington lost over a dozen quilt shops. A few new shops have opened here and there but for the most part these stores left a void when they closed.
A quilt shop needs customers to survive and they need steady traffic and sales to keep their doors open. We are told the economy is booming but this isn’t ‘trickling down’ to the quilt shops, many of them are still struggling to stay in business. They need a consistent base of buying customers to keep their doors open, popping in once in a while when you need some thread or to buy a quilt back is not going to do it, quilters need to support their local quilt shops – please – do your part to keep them in business.
Despite being a huge box store, it’s true that when you shop at JoAnn’s you are helping a local person stay employed but shopping there is a different retail experience. When was the last time a JoAnn’s employee helped you pick just the right combination of fabrics for a quilt pattern you were making? Do they come out from behind the counter and help you pick the correct color of thread to coordinate with your fabrics? Can they tell you which kind of batting is better for hand vs. machine quilting? Will they even try to help you calculate how much more fabric you will need to take a twin sized quilt pattern and bump it up to a queen size? And do they carry some of the quilting specialty items like Sashiko needles, or Golden Threads Quilting Paper? If you value these products and services you need to shop at your local quilt store.
Support diversity, support your local quilt shops and small business sewing machine shops, don’t let another small business quilt/sewing machine shop close its doors if you can help it.
Years ago, I was hand quilting a raffle quilt I had designed for my guild at the annual show. I brought my original drawing done in pencil on a large sheet of quadrille drafting paper thinking some of the viewers might find it interesting to see the original design with the actual quilt. One morning a gentleman came to the show – you don’t see a lot of men at quilt show, particularly younger ones. He walked around the quilt admiring it then noticed the drawing which he picked up and studied. Asking if I was the designer, he followed that with the rather vague question “What did you use?” I asked for clarification and he repeated the question adding “What program?”. I told him I had not used any computer program to design the quilt and astonished, he asked “But then how did you do this?” indicating the drawing. “The old fashioned way”, I replied, “with pencil and paper”. Ah – the good old days, when pencils ruled the art studio.
In this modern age, many artists rely on computers to draft and draw quilt (and other) designs; I still love to use pencils. Just me, the paper, a pencil and a good eraser – how Zen! When it comes to pencils, there are many types, hardness of leads and brands to choose from but after all is said and done, it boils done to two choices – a mechanical (sometimes also called ‘technical’) pencil or the good old fashioned graphite lead encased in a rod of wood – the quintessential ‘Pencil’. I like to use mechanical pencils for certain things, you can’t beat their consistent fine tip for detailed drawing but they are fragile, break constantly and the leads can be a pain to replace; they come in several sizes that look alike to the naked eye and you’d better replace the lead with the correct size or there will be trouble.
Traditional wooden pencils don’t keep their sharp points for long, they wear down and become blunted but are much better when it comes to shading as in tone drawings, you use the pencil at an angle (or in some cases sharpen the lead with a knife into a chisel point). In general, the points are not quite as fragile as the lead on a mechanical pencil but getting a long tapered tip that keeps its point for a while is a challenge. Which leads me to the ‘point’ – ha, ha… of this blog post. What pencil sharpener do you like the best?
For years, my favorite was the old fashioned wall mounted hand crank type like every classroom had when I was growing up, stick the pencil into the hole on the left side and turn the crank with your right hand. I have two of these – one that takes standard sized writing pencils and the other has a rotating wheel with different sized holes to accommodate different sizes of pencils. I love them but they are finally getting ancient and one does not so much sharpen as chew the pencils so I recently bought a plug-in electric one by Ikong. It was supposed to be ‘heavy duty’ which I am assuming refers to its longevity because it certainly does not weigh a lot like an old Panasonic we also have. My biggest complaint about the Ikong is that it’s light enough to dislodge and knock off of the desk, my second complaint – that it’s very hard to clear a broken lead tip from the grinding blades. But enough about the office/classroom type of sharpeners, that is not what I’m writing about today, I want to discuss the small portable hand held type and my quest for the ‘perfect pencil sharpener’.
When I was taking art classes in college, I had a sharpener I loved. My mother had given it to me and it was originally intended as a sharpener for an eyeliner pencil. It had one of those enclosed compartments for the shavings making it less messy to use but what I loved the most about it was the long tapered point it created. Sadly, I lost it at some point and since then have bought endless hand held sharpeners in a vain attempt to find another one that makes as long and tapered a point. I have been sold the ‘best’ hand held sharpener at an art store (NOT), and bought a number of others including some intended for makeup as my original one was. So far I have been unsuccessful in finding the perfect sharpener though some have come close.
What makes a small sharpener perfect? #1 – The blade must be sharp! Sharp enough to shave not chew the pencil and it must stay sharp. A sharpener that does an excellent job on the first dozen or two pencils and then deteriorates is NOT a perfect sharpener, I don’t look at these as disposable tools like BIC lighters, too many of those in landfills. I know every blade has a lifespan and trying to resharpen the tiny blades on a pencil sharpener is unrealistic but it should give good service for years, not weeks. #2 – A perfect sharpener will also have a reservoir for the shavings, it’s disruptive to the creative mood to have to set aside your drawing project to find a trash can to sharpen your pencil into and as for portable tabletop trash containers, I’ve knocked over more than I can count and pencil shavings are incredibly hard to pick out of carpeting. #3 – The tapered tip of the sharpener needs to be accessible and easy to clear of a clogged lead, preferably without damaging the sharpening blade. #4 – It needs to fit into a pencil case or pouch. I carry around my pencils, a few Pigma Micron pens, a white quilters’ pencil, a Sharpie or two and a good eraser in several pencil boxes and zippered pouches and the sharpener has to fit in there with them, one in each set of drawing tools. #5 – And finally, it has to sharpen the pencil to a long tapered point.
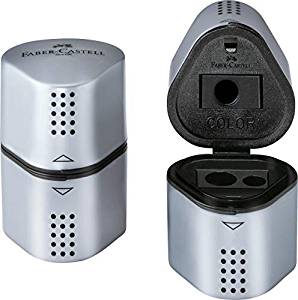
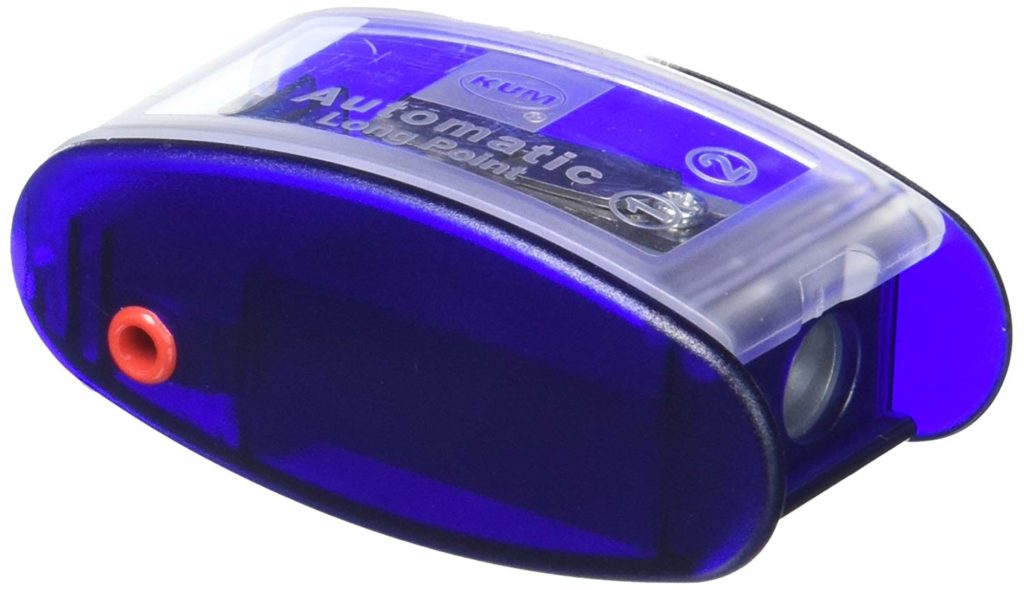
Finding a sharpener that meets all five parameters is not easy and I finally found two that come close to being perfect. One by Faber-Castell, the taper on the point could be a bit better but it’s not bad plus it has a special sharpening port for colored pencils and two sizes of drawing pencils. Drawback – it’s too bulky to fit into a standard pencil case or pouch. And one from a company named KUM that does a great job of perfect points, has four sharpening ports (one for putting a point on drafting pencils using 2mm – 3.2mm leads) but I haven’t used it long enough yet to determine if the blades will be long lasting.
Faber-Castell
KUM
KUM fits easily into a pencil case
Look for them at your local art supply store and if you can’t find them, they are both available on Amazon: Faber-Castelland KUM.