As much as I love to quilt, it isn’t the only crafty thing I do; Paper craft is my other big love (though it definitely takes a backseat to quilting and embroidery). 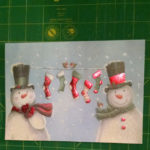
Since childhood, I’ve been a born recycler though that term did not exist back then, it’s actually what got me interested in quilting – using up leftover scraps of fabric my mother considered trash from her garment sewing. I love making things out of paper – origami, cut paper, and paper sculpture… I also save interesting printed pieces of paper and recycle bows and ribbons for gift wrapping as long as they are in good shape. One of the other things I started to do years ago is making gift tags from this year’s Christmas cards for next year’s gift wrapping – one less holiday item to buy and it gives a second life to the cards before going into a recycling bin.
To make these you will need:
- A cutting mat, rotary cutter and 6” square (or thereabouts) cutting ruler. The cutter blade should be sharp but it
 will probably be useless for fabric after this project so an older blade that needs replacing anyway is a good option.
- A ‘bone’ paper folding knife or similar tool (I use the blunt backside of a seam ripper)
- Small craft hole-punch (optional) – Fiskars makes one that makes a ⅛” hole.
- Craft glue stick (optional); make sure it is a permanent adhesive
- Holiday Greeting cards
INSTRUCTIONS
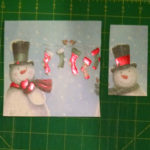
- Any card can be turned into a gift tag but I like to select cards with design elements that will fit well into the small
 tag format; in many cases I can get several tags from one card. The tags can be any size or shape you want as long as they are not too large.
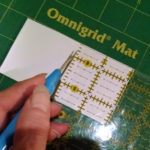
- If the card is free of personal writing on the backside of the cover, you can simply cut out a square/rectangle that it twice as wide (or tall if using a top fold) as the finished size you want for the image selected. TIP: in some cases you might even be able to cut the tag near enough to the original fold in the card to use it as your fold; otherwise, you will need to score a folding crease. The crease can be horizontal or vertical depending on where you want the fold in relation to the front image (the tag can fold along the left side like a book or along the top edge). Make the crease on the ‘inside’ of the tag using your ruler to measure precisely where it should go and the bone knife or other tool to score a fold line.
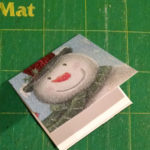
- Fold the tag along the crease line and burnish the fold with the smooth edge of the tool (or your thumbnail) to set the crease. Depending on how accurately you placed the crease line, you may need to trim and neaten the tag edges with the rotary cutter and ruler. The resulting tag can be fixed to the gift with scotch tape or you can punch a hole in the top left-hand corner if you want to attach the tag with a loop of ribbon or string – helpful if you are attaching a tag to an odd shaped object like a gift basket.
- if there is writing on the backside of the cover but you like and want to use the image, you can still cut out a square or rectangle with the part of the image you want and glue it to the ‘front’ of a piece of folded cardstock. TIP: I often salvage the blank parts of the cards to make these folded tag blanks and then trim the images to fit on them.
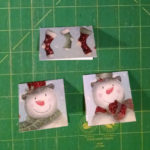
- Other tips: In some cases, you might be able to salvage the commercially printed ‘sentiment’ inside the card so your tag might read ‘Season’s Greetings’ or ‘Peace and Joy be with you’ on the tag cover. Cutting the tags from the cards with a rotary cutter is fast and accurate but you can add decorative edges to the tags by cutting with the contoured paper craft scissors available at craft stores. In cases where I remember who sent me the card, I often use a tag made from their card on a gift for the sender the following year (not that I’m certain they might remember it was their card but it’s fun anyway).
I know some of you will think this is a lot of fussy work (I had one cynical person tell me to ‘get a life’ when I showed 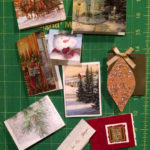 these to a craft group) but I love the fact that I am giving a second ‘life’ to something that would otherwise go straight into a recycling bin or a landfill if the card material is not recyclable plus I’m not having to buy premade gift tags along with the other wrapping paraphernalia; so save those greeting cards and give them a little more life before discarding (pun intended) them.


 will probably be useless for fabric after this project so an older blade that needs replacing anyway is a good option.
 tag format; in many cases I can get several tags from one card. The tags can be any size or shape you want as long as they are not too large.

 these to a craft group) but I love the fact that I am giving a second ‘life’ to something that would otherwise go straight into a recycling bin or a landfill if the card material is not recyclable plus I’m not having to buy premade gift tags along with the other wrapping paraphernalia; so save those greeting cards and give them a little more life before discarding (pun intended) them.