• Category Archives Tips, Tricks and Techniques
  • Handy little secrets to make quilting easier

  • In Celebration of Pencil and Paper

    In this digital age of technology I would like to pause, unplug and contemplate the low-tech pencil. These days, most of the quilters I know are all about the high tech toys. Tools like Electric Quilt and CAD programs, Adobe Illustrator… I admit I am partial to Corel Draw to bring my patterns to their pre-press stage.

    BUT – for the preliminary design stage nothing beats a pencil and paper (and a good eraser). The sheer joy of holding an organic tool that is a natural extension of my fingers and hand. There is a sensory link between my fingers and the pencil, I could swear my nerve endings run right down the wood and minerals down to the paper. I know there are some who would say the same thing about a mouse or a stylus but to me, there is an electronic barrier with those much like the difference between a phone conversation and speaking to a person in the same room or like listening to a recording vs. listening to a live performance. Digital drawing is like trying to caress and feel an object while wearing gloves.

    The process of drawing with a pencil is a meditative Zen experience – just me the pencil and the paper – no electricity, no digital translation of my motions through a filter of circuitry. Anyone who has explored tone drawing will know exactly what I am talking about; it’s like controlling your breath to evoke musical notes from a flute or the pressure of your fingers teasing ethereal sounds from a violin.

    I know it is more painstaking to work with graphite on paper, mistakes are harder to change or remove and for many processes such as duplicating a repetitive pattern, drawing by hand is more labor intensive and time consuming. I do it purely for the pleasure, the delight of seeing line and form emerge from the pencil like my life blood running down this  appendage that once had a life of its own as a part of a living tree.

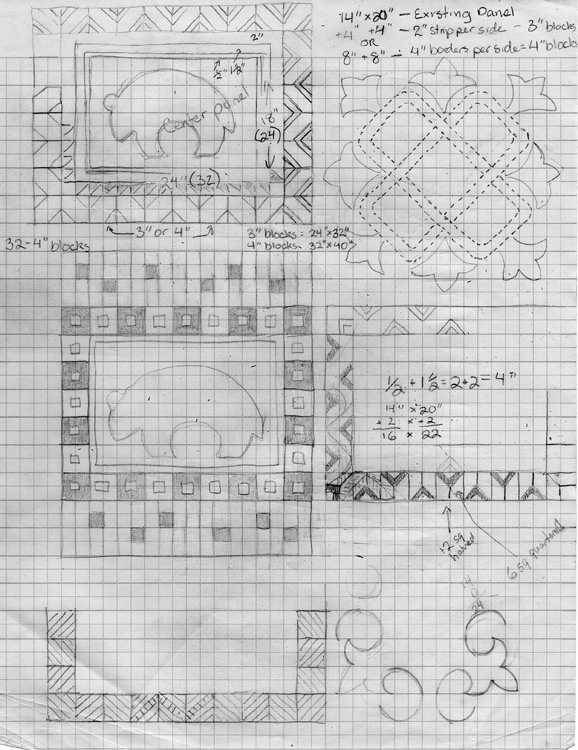
    Here is an example of a contemplation in pencil, trying to work out a border design for one of my Totem quilts.

    Playing with border designs
    Playing with border designs

    And a final observation of the humble pencil – I have heard it said that NASA spent millions of dollars on research and development of a pen that would work in zero gravity; the Russians bypassed the expense and hassle by using – A PENCIL!


  • Recycle Those Greeting Cards Into – Gift Tags!

    As much as I love to quilt, it isn’t the only crafty thing I do; Paper craft is my other big love (though it definitely takes a backseat to quilting and embroidery). xmastag1

    Since childhood, I’ve been a born recycler though that term did not exist back then, it’s actually what got me interested in quilting – using up leftover scraps of fabric my mother considered trash from her garment sewing. I love making things out of paper – origami, cut paper, and paper sculpture… I also save interesting printed pieces of paper and recycle bows and ribbons for gift wrapping as long as they are in good shape. One of the other things I started to do years ago is making gift tags from this year’s Christmas cards for next year’s gift wrapping – one less holiday item to buy and it gives a second life to the cards before going into a recycling bin.

    To make these you will need:

    • A cutting mat, rotary cutter and 6” square (or thereabouts) cutting ruler. The cutter blade should be sharp but it xmastag3will probably be useless for fabric after this project so an older blade that needs replacing anyway is a good option.
    • A ‘bone’ paper folding knife or similar tool (I use the blunt backside of a seam ripper)
    • Small craft hole-punch (optional) – Fiskars makes one that makes a ⅛” hole.
    • Craft glue stick (optional); make sure it is a permanent adhesive
    • Holiday Greeting cards

    INSTRUCTIONS

    1. Any card can be turned into a gift tag but I like to select cards with design elements that will fit well into the small xmastag4
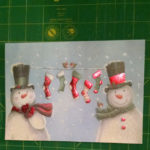
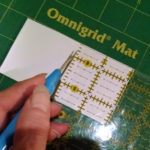
tag format; in many cases I can get several tags from one card. The tags can be any size or shape you want as long as they are not too large.
    2. If the card is free of personal writing on the backside of the cover, you can simply cut out a square/rectangle that it twice as wide (or tall if using a top fold) as the finished size you want for the image selected. TIP: in some cases you might even be able to cut the tag near enough to the original fold in the card to use it as your fold; otherwise, you will need to score a folding crease. The crease can be horizontal or vertical depending on where you want the fold in relation to the front image (the tag can fold along the left side like a book or along the top edge). Make the crease on the ‘inside’ of the tag using your ruler to measure precisely where it should go and the bone knife or other tool to score a fold line.xmastag6
    3. Fold the tag along the crease line and burnish the fold with the smooth edge of the tool (or your thumbnail) to set the crease. Depending on how accurately you placed the crease line, you may need to trim and neaten the tag edges with the rotary cutter and ruler. The resulting tag can be fixed to the gift with scotch tape or you can punch a hole in the top left-hand corner if you want to attach the tag with a loop of ribbon or string – helpful if you are attaching a tag to an odd shaped object like a gift basket.
    4. if there is writing on the backside of the cover but you like and want to use the image, you can still cut out a square or rectangle with the part of the image you want and glue it to the ‘front’ of a piece of folded cardstock. TIP: I often salvage the blank parts of the cards to make these folded tag blanks and then trim the images to fit on them.xmastag7b
    5. Other tips: In some cases, you might be able to salvage the commercially printed ‘sentiment’ inside the card so your tag might read ‘Season’s Greetings’ or ‘Peace and Joy be with you’ on the tag cover. Cutting the tags from the cards with a rotary cutter is fast and accurate but you can add decorative edges to the tags by cutting with the contoured paper craft scissors available at craft stores. In cases where I remember who sent me the card, I often use a tag made from their card on a gift for the sender the following year (not that I’m certain they might remember it was their card but it’s fun anyway).

    I know some of you will think this is a lot of fussy work (I had one cynical person tell me to ‘get a life’ when I showed xmastag8
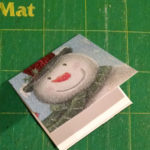
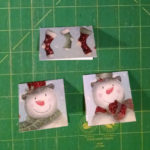
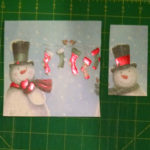
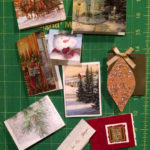
these to a craft group) but I love the fact that I am giving a second ‘life’ to something that would otherwise go straight into a recycling bin or a landfill if the card material is not recyclable plus I’m not having to buy premade gift tags along with the other wrapping paraphernalia; so save those greeting cards and give them a little more life before discarding (pun intended) them.


  • Upcoming Event

    Greetings on this fine (if wet and gray) Monday morning. Fall is often a busy time for me with workshops and lectures and this Fall is proving to be no different. About a week and a half ago, I taught and lectured at Northwest Quilting Expo,  some of my classes had better attendance than others but all had enough enrollment for the class to proceed – no cancelled classes YAY. My Simple Sashiko Landscapes was particularly popular and you can look for it to be offered at some of the local shops during the upcoming winter/spring class season.

    Onto the next events – on Monday October 10, I will be giving a presentation for my own guild , Northwest Quilters, on Color Theory – ‘Speaking in Colors’. This lecture is perfect for anyone who wishes to better understand color and how to use it but particularly so if you struggle with picking your own color schemes or if you have ever made a quilt from colors you love only to discover you are not satisfied with the quilt but don’t know what went wrong. The lecture is educational and includes a trunk show of quilts the use or illustrate the principles that will be covered in the lecture.

    The Guild meeting starts at 7pm, non-members are required to pay a $5 fee which is refunded if the attendant chooses to become a member of the guild that evening. I personally think the benefits membership in the guild brings is well worth the $32 dues – access to the extensive library alone would lure me not to mention other activities such as programs, workshops, UFO days and retreats… plus the camaraderie of fellow quilters passionate about this wonderful pursuit.

    A few days after that, I will be in Tillamook teaching two workshops for the Latimer Quilt and Textile Center for their Adult Day Camp; more info on that to come in the next post.

    Extended color wheel of fabric
    Extended color wheel of fabric