• New Design Class

    I tend to get excited about all my classes, I wouldn’t offer them if I didn’t feel they were something to crow about. Every now and then though, I come up with something refreshingly different from what I have done before and I get particularly enthusiastic about those. My upcoming workshop for Northwest Quilters  in March is one such class. I have taught a couple of classes for my guild over the last few years and because most of the members know me by reputation if not by sight, I have felt it necessary to come up with something completely new whenever I have the honor of offering a class through them. I do have a cadre of ‘followers’ who take many of the classes I teach (sometimes more than once) and I feel an obligation to offer something new that I’ve not offered at the shops when I present a workshop for my guild; after all, many of the members have taken my other classes through shops already and I want to try to fill my workshop as well as possible.

    Though I never completed a degree in Art, I did take some fairly advanced classes in college and had a great professor who taught me some wonderful insights into art and what I was capable of. In his ‘design’ course – Form and Color – he encouraged us to use subject matter for our assignments where the preconceived notion of what your are drawing does not take over the process of developing good balance and composition. I still hear his voice telling us that “the moment you decide to draw a fish, that fish takes over your hand and directs what it should look like…” He showed us a unique way to find abstract designs in nature, he called these ‘Discovery Designs’. Those of you who have studied art will probably already be familiar with this design process but for many it will open your eyes to design possibilities beyond your imagination. The best part is that you don’t need to have good drawing skills to use this method.

    This will be a design class only, students will ‘find’ their discovery and then create working drawings to play with, fine tuning the design and rendering some color layouts using colored pencils. When you are pleased with your design, you will have a design you can enlarge to any size you wish and make a working pattern from which to make your quilt.

    I am anxious to promote this as much as possible through my website and social media, I have shown my quilt in progress over the last couple of months at guild meetings but only put the final binding on the finished quilt a few days ago. I was planning to show it again at the Northwest Quilters’ meeting this morning but the weather had other ideas; not only did our out of state guest speaker have to cancel (I guess the weather where she lives was even worse than here) but last night the word went out that the entire meeting was being cancelled due to treacherous driving conditions. It is my hope that I can reach a sufficient number of students through the newsletter and the internet.

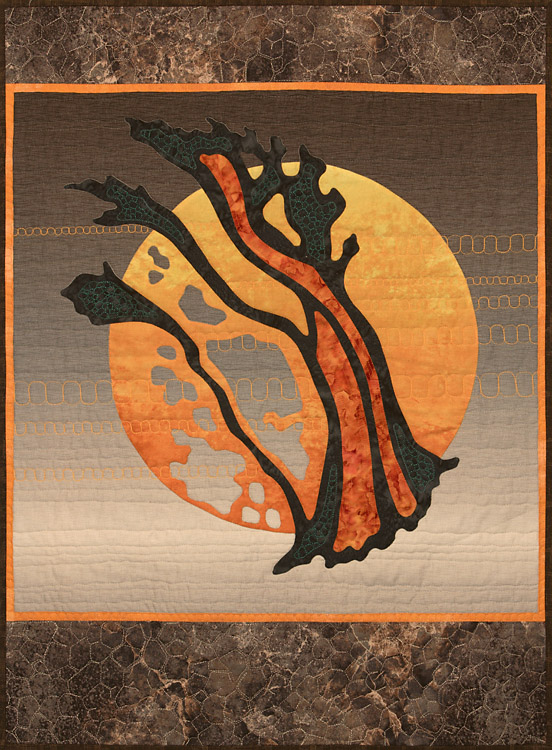
    I have posted a photo of my project below. Bear in mind this is my original design, it is not a pattern that you will be working from to create this quilt, you will search for and discover your own unique design.

    A Discovery design, finding abstract designs from nature 'through the lens'
    A Discovery design, finding abstract designs from nature ‘through the lens’

  • Recycle Those Greeting Cards Into – Gift Tags!

    As much as I love to quilt, it isn’t the only crafty thing I do; Paper craft is my other big love (though it definitely takes a backseat to quilting and embroidery). xmastag1

    Since childhood, I’ve been a born recycler though that term did not exist back then, it’s actually what got me interested in quilting – using up leftover scraps of fabric my mother considered trash from her garment sewing. I love making things out of paper – origami, cut paper, and paper sculpture… I also save interesting printed pieces of paper and recycle bows and ribbons for gift wrapping as long as they are in good shape. One of the other things I started to do years ago is making gift tags from this year’s Christmas cards for next year’s gift wrapping – one less holiday item to buy and it gives a second life to the cards before going into a recycling bin.

    To make these you will need:

    • A cutting mat, rotary cutter and 6” square (or thereabouts) cutting ruler. The cutter blade should be sharp but it xmastag3will probably be useless for fabric after this project so an older blade that needs replacing anyway is a good option.
    • A ‘bone’ paper folding knife or similar tool (I use the blunt backside of a seam ripper)
    • Small craft hole-punch (optional) – Fiskars makes one that makes a ⅛” hole.
    • Craft glue stick (optional); make sure it is a permanent adhesive
    • Holiday Greeting cards

    INSTRUCTIONS

    1. Any card can be turned into a gift tag but I like to select cards with design elements that will fit well into the small xmastag4
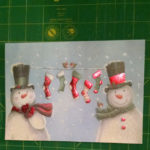
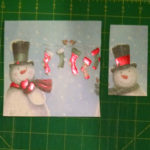
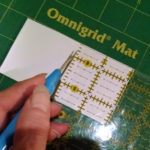
tag format; in many cases I can get several tags from one card. The tags can be any size or shape you want as long as they are not too large.
    2. If the card is free of personal writing on the backside of the cover, you can simply cut out a square/rectangle that it twice as wide (or tall if using a top fold) as the finished size you want for the image selected. TIP: in some cases you might even be able to cut the tag near enough to the original fold in the card to use it as your fold; otherwise, you will need to score a folding crease. The crease can be horizontal or vertical depending on where you want the fold in relation to the front image (the tag can fold along the left side like a book or along the top edge). Make the crease on the ‘inside’ of the tag using your ruler to measure precisely where it should go and the bone knife or other tool to score a fold line.xmastag6
    3. Fold the tag along the crease line and burnish the fold with the smooth edge of the tool (or your thumbnail) to set the crease. Depending on how accurately you placed the crease line, you may need to trim and neaten the tag edges with the rotary cutter and ruler. The resulting tag can be fixed to the gift with scotch tape or you can punch a hole in the top left-hand corner if you want to attach the tag with a loop of ribbon or string – helpful if you are attaching a tag to an odd shaped object like a gift basket.
    4. if there is writing on the backside of the cover but you like and want to use the image, you can still cut out a square or rectangle with the part of the image you want and glue it to the ‘front’ of a piece of folded cardstock. TIP: I often salvage the blank parts of the cards to make these folded tag blanks and then trim the images to fit on them.xmastag7b
    5. Other tips: In some cases, you might be able to salvage the commercially printed ‘sentiment’ inside the card so your tag might read ‘Season’s Greetings’ or ‘Peace and Joy be with you’ on the tag cover. Cutting the tags from the cards with a rotary cutter is fast and accurate but you can add decorative edges to the tags by cutting with the contoured paper craft scissors available at craft stores. In cases where I remember who sent me the card, I often use a tag made from their card on a gift for the sender the following year (not that I’m certain they might remember it was their card but it’s fun anyway).

    I know some of you will think this is a lot of fussy work (I had one cynical person tell me to ‘get a life’ when I showed xmastag8
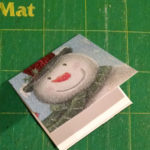
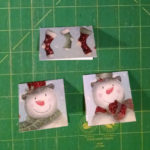
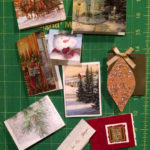
these to a craft group) but I love the fact that I am giving a second ‘life’ to something that would otherwise go straight into a recycling bin or a landfill if the card material is not recyclable plus I’m not having to buy premade gift tags along with the other wrapping paraphernalia; so save those greeting cards and give them a little more life before discarding (pun intended) them.


  • Palais Ideal

    Once in a while I like to digress from my usual quilting stuff to share really cool discoveries I’ve made; this is one.

    I discovered this place in some travel documentary I saw many years ago and now and again it bubbles up into my consciousness.

    This structure has been designated a National Historical Monument in France. Built by a humble postman starting in 1879, this fantastic ‘palace’ took 33 years to complete in 1912. It was the brainchild of Ferdinand Cheval, a postman who started collecting stones he found on his 18 mile delivery rounds pushing a wheelbarrow to collect and carry home the stones to build his dream castle; a task he pursued by himself with no outside help other than his dreams and own two hands.

    I have seen many photographs of this palace but now with the help of You Tube, you can take a virtual tour of the monument. As you explore the stairways, terraces and hidden alcoves, bear in mind that this was built by one crazy focused genius all by himself. Just goes to show what one can do if they are passionate about their vision. Remember too, that this was built by a man with no architectural training in an era where even do-it-yourself construction manuals would have been hard to come by let alone access to the internet. I wonder if he shared a soul with Walt Disney in a past life.

    If I ever get to go to France this will definitely be on my bucket list – Magnificent!